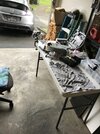
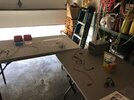
Aloha OF. My names Robert (Lopaka is Hawaiian for Robert), and I live on the east side of Oahu like my profile pic says. I'm an old Oakley fan since my first M frames back in the 90's. And while I'm not a heavy collector like a lot of you, I've found that I really enjoy fixing up my own glasses. I live in a townhouse with a two car enclosed garage, and don't have any extra space for my extra hobbies. So my garage is where I do all my work, because it's easy to pull a car out and set up a table or two. The back of my garage is a mess, and someday I'll take a whole picture 'after' I clean up. I have (wifes) stuff in boxes, stacked up on the side, from when we moved in 5-6 years ago. Lol. 
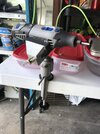
The DIY part to all this came about for a couple of reasons. First, I hate shipping things back and forth. I feel like it's just a matter of time till something gets lost. I live on an island and don't have much choices. And second. I'm actually a very impatient guy. I won't outwardly show it, but man, it seems nothing moves fast enough for me. Maybe that comes from being in a trade where production is everything. So yes, even some of the quickest turn-around times still get me biting nails. I hate the long term anxiety that comes with waiting. And half of that time could be in shipping.
Lopaka's DIY Garage is my chronicle of the things I've done since joining the Forum. I started with basic lens and rubber swaps. Then I got into X-metals and started taking those apart and putting them back together. Right now I'm polishing and anodizing, and am still working to perfect (better) both. I also have a couple air brushes and have been practicing with some painting. So I am planning on doing some O-matter as well. I am a total amateur-novice in all aspects of customizing glasses frames, and just wanted to share my experiences for two reasons. First. I'm hoping I can provide info for others, to pass on things that I've learned. Even if it may be a 'what not to do'. Lol. And second. I'm hoping I can use this as a place to learn from others. Like be honest and tell me if I'm doing something that isn't correct. I'll never take any constructive criticism the wrong way. And I'll always be open to any ideas, tip, or tricks.
I'm going to rehash on some older stuff in leading up to the present day. So please bear with me if the beginnings of this thread is old-hat.

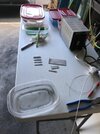
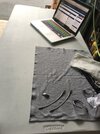
Note about photo above. I sold most of what you see. Sorry.


The DIY part to all this came about for a couple of reasons. First, I hate shipping things back and forth. I feel like it's just a matter of time till something gets lost. I live on an island and don't have much choices. And second. I'm actually a very impatient guy. I won't outwardly show it, but man, it seems nothing moves fast enough for me. Maybe that comes from being in a trade where production is everything. So yes, even some of the quickest turn-around times still get me biting nails. I hate the long term anxiety that comes with waiting. And half of that time could be in shipping.
Lopaka's DIY Garage is my chronicle of the things I've done since joining the Forum. I started with basic lens and rubber swaps. Then I got into X-metals and started taking those apart and putting them back together. Right now I'm polishing and anodizing, and am still working to perfect (better) both. I also have a couple air brushes and have been practicing with some painting. So I am planning on doing some O-matter as well. I am a total amateur-novice in all aspects of customizing glasses frames, and just wanted to share my experiences for two reasons. First. I'm hoping I can provide info for others, to pass on things that I've learned. Even if it may be a 'what not to do'. Lol. And second. I'm hoping I can use this as a place to learn from others. Like be honest and tell me if I'm doing something that isn't correct. I'll never take any constructive criticism the wrong way. And I'll always be open to any ideas, tip, or tricks.
I'm going to rehash on some older stuff in leading up to the present day. So please bear with me if the beginnings of this thread is old-hat.
Note about photo above. I sold most of what you see. Sorry.
Last edited:

